Tri-Alliance Clash Event: Complete KingShot Guide
Everything you need to win the Tri-Alliance Clash: rules, point system, pre-event setup, building priorities, and reward brackets — with a full video walkthrough.
Master the monthly 3-way alliance showdown with smart prep, building control and precise team timing.
Complete Video Strategy
Event Images
Tap images to view larger: pre-event setup, rules, building secrets, and rewards.

Strategy & Details
A Comprehensive Guide to KingShot's Tri-Alliance Clash Event
Introduction
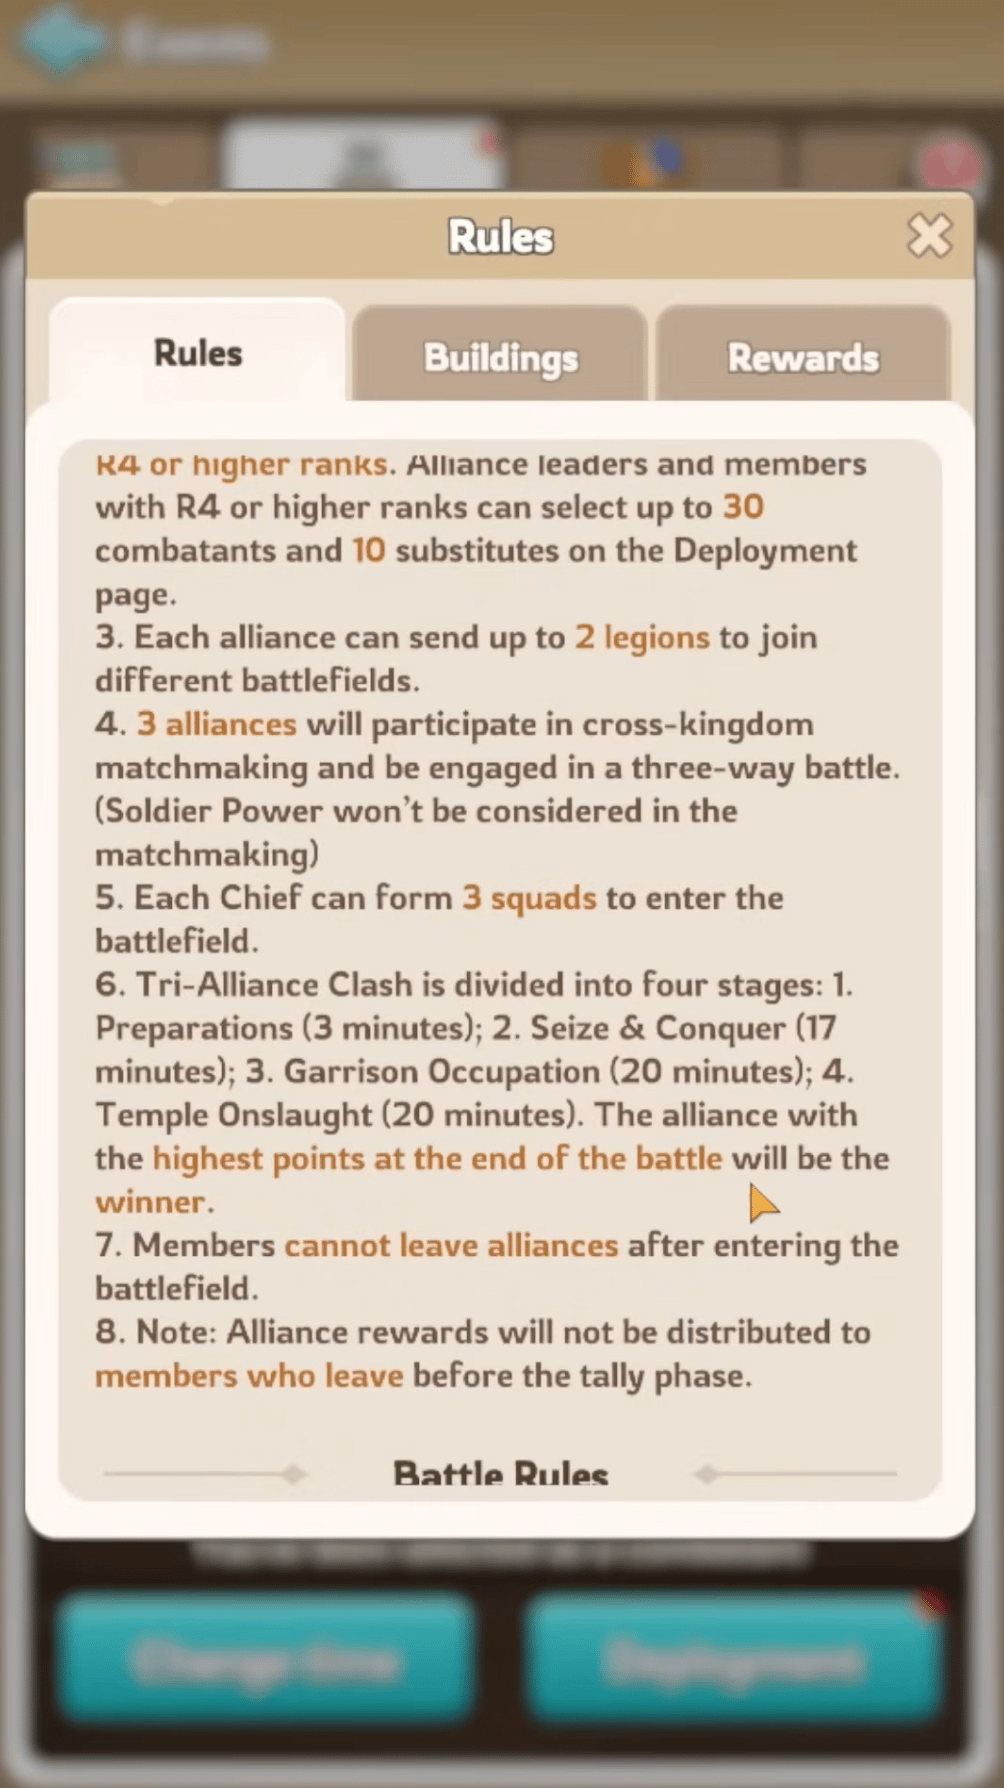
The Tri-Alliance Clash is a premier competitive, three-way alliance event in KingShot where strategy, coordination, and timing are paramount. In this event, your alliance competes against two others on a dedicated battlefield with the sole objective of accumulating the most points. Winning provides access to a wealth of rare rewards, including exclusive items from the Tidal Shop, making it one of the most rewarding events in KingShot. This guide breaks down every aspect of the event, from the fundamental rules to advanced strategies for each phase of the battle.
Part I: Tri-Alliance Fundamentals
Before diving into strategy, it's crucial to understand the core mechanics of the event in KingShot.
1. The Core Objective: The Point System The ultimate goal is to have the highest point total when the battle ends. Points are earned in two primary ways:
- Alliance Points: These are generated over time by capturing and holding various buildings on the map. The alliance with the highest points at the end of the battle is declared the winner.
- Personal Points (Merit): These are earned by individual players through combat actions. Your personal point total determines your rank on the individual leaderboard and the quality of your personal rewards.
2. Gameplay Mechanics: Squads, Energy, and Auto-Battles
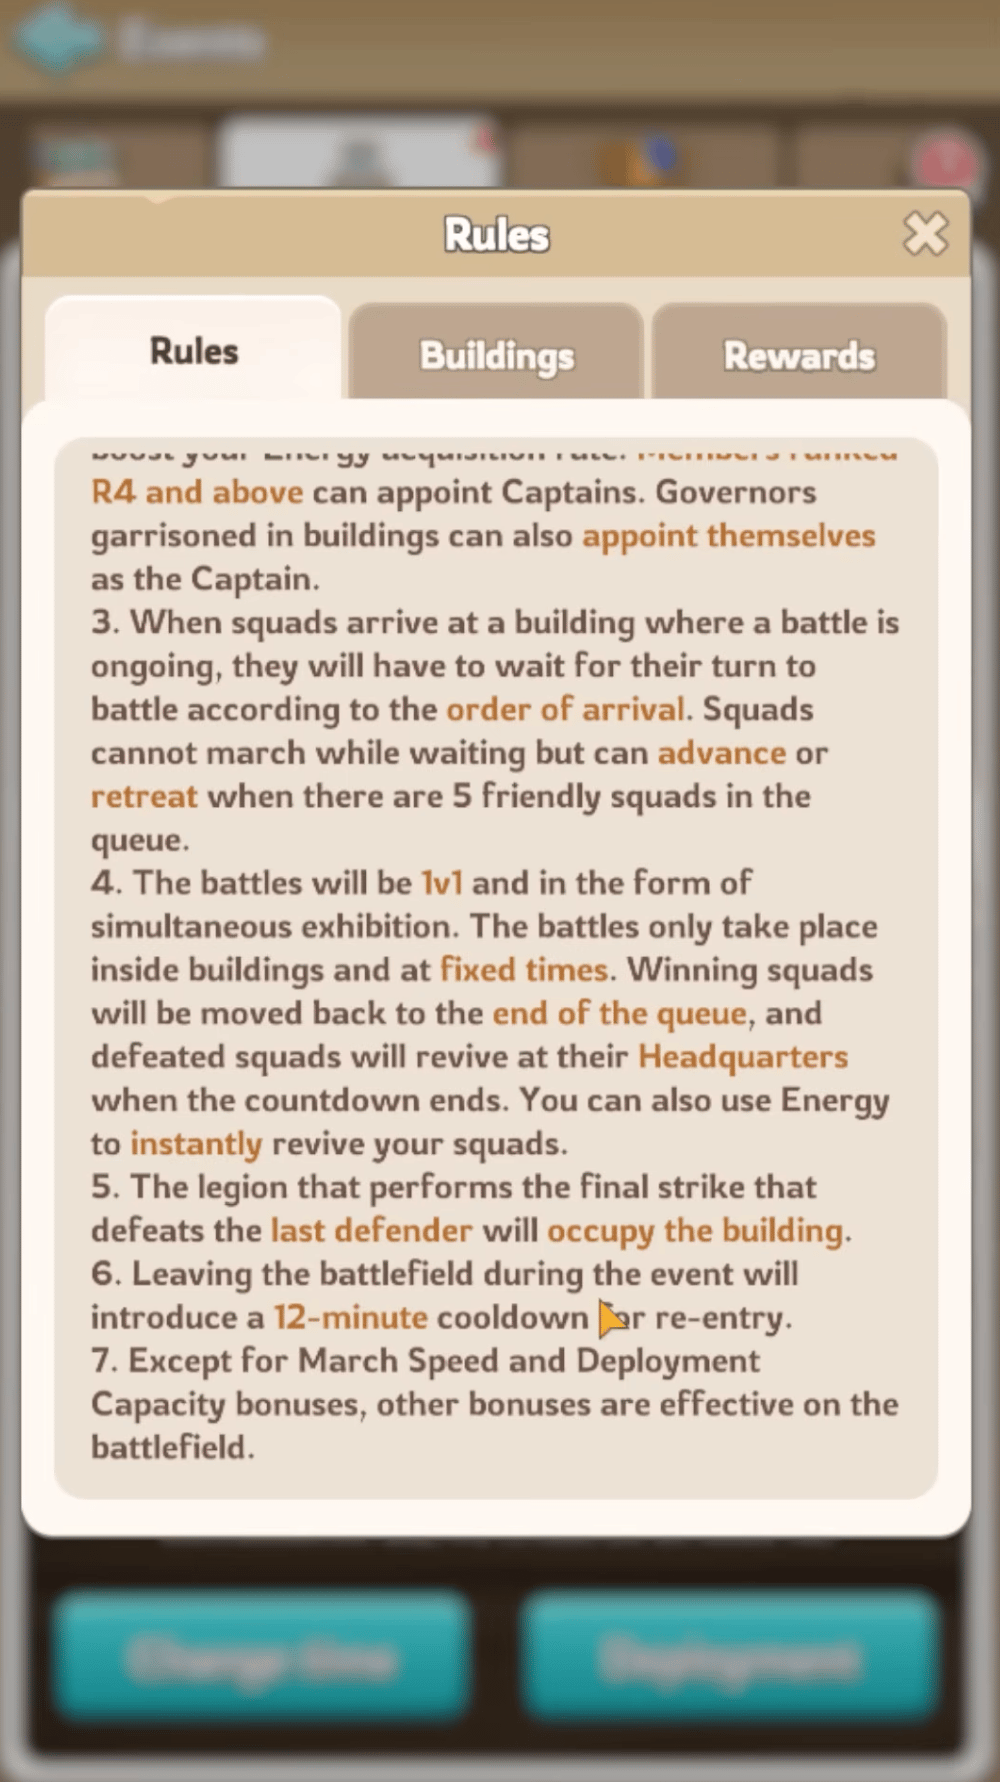
- Squads: Each player (Chief) commands three pre-configured squads. These squads have a fixed number of troops, and you cannot lose any of your own troops in the battle. Your role is not to micromanage the fights but to strategically direct your squads across the map.
- Energy: All major actions on the battlefield cost Energy. This includes deploying your squads to a new location, reviving defeated squads, and conscripting (healing) injured squads. Energy regenerates automatically over time, and this rate can be boosted.
- Battles: When your squad arrives at a building occupied by an enemy, a 1-vs-1 auto-battle begins. Additional squads from either side will form a queue and fight sequentially. Winning squads move to the back of their own queue, while defeated squads are sent back to the Headquarters to revive.
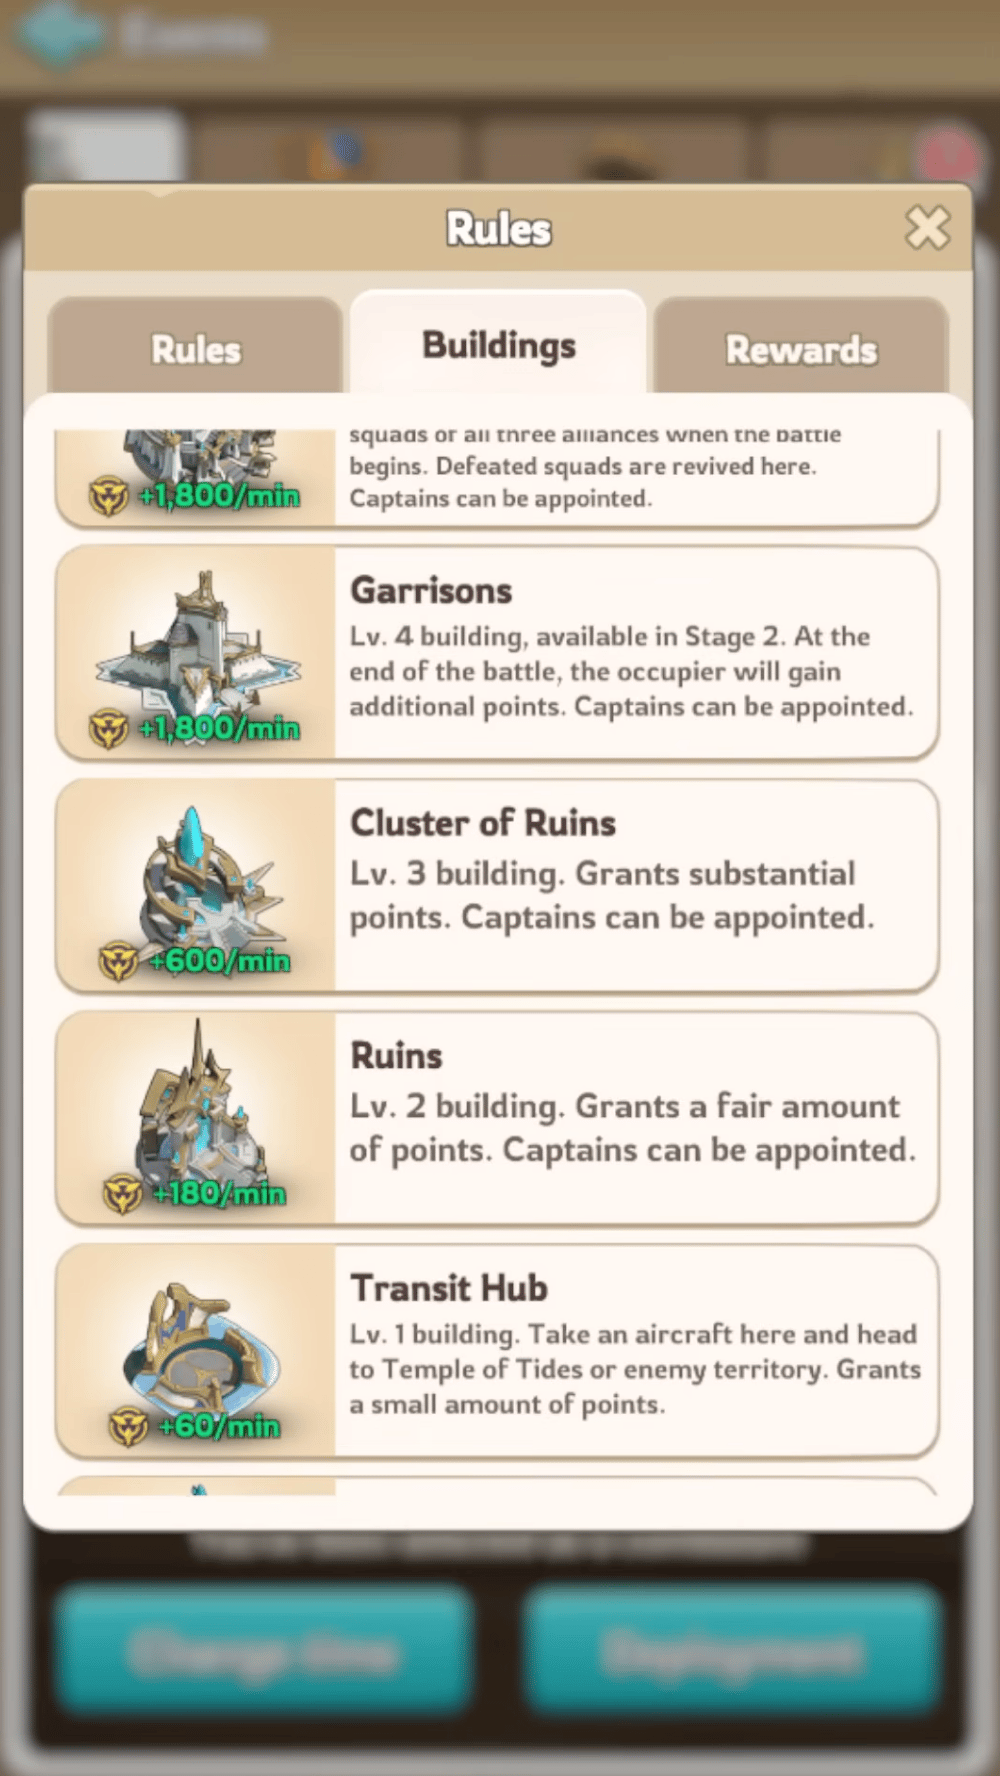
3. The Battlefield: Building Types and Their Value The map is filled with various buildings that provide points when occupied. The more valuable the building, the more contested it will be.
| Building Name (in Rules) | Building Name (on Map) | Points/Min | Notes |
|---|---|---|---|
| Temple of Tides | Temple of Tides | +1,800/min | Unlocks in Stage 3. The alliance holding it at the end gains a 50,000 point bonus. |
| Headquarters | Earth/Storm/Tidal Palace | +1,800/min | Your starting point. Where defeated squads revive. |
| Garrisons | Earth/Storm/Tidal Garrison | +1,800/min | Unlocks in Stage 2. Provides a significant energy generation bonus and an end-of-battle point bonus. |
| Cluster of Ruins | Earth/Storm/Tidal Shrine | +600/min | Grants substantial points and a high-value captain slot for energy generation. |
| Ruins | Earth/Storm/Tidal Altar | +180/min | Grants a fair amount of points and a basic captain slot. |
| Transit Hub | Transit Hub | +60/min | Grants a small number of points. Strategically important for map movement. |
| Pillars | Pillar of Law / Pillar of Oath | +60/min | Grants a small number of points. |
4. Understanding the Reward System Rewards are distributed based on two separate ranking systems:
- Alliance Ranking Rewards: Your alliance's final rank (1st, 2nd, or 3rd) is determined by the performance of its Legion 1 team. All members of the winning Legion 1's alliance receive the top-tier alliance rewards.
- Personal Ranking Rewards: These are based on your individual point total (Merit). There are separate reward brackets for Legions that finish 1st, 2nd, and 3rd. Your rewards are determined by your point total within your Legion's finishing bracket.
- Overall Personal Ranking: There is also a leaderboard that ranks every individual participant. The highest-ranking players receive exclusive rewards, such as a 30-day "Tidebringer Avatar Frame."
Part II: Preparation Strategies
Success in KingShot's Tri-Alliance Clash begins before the battle starts.
1. Matchmaking The game matches alliances based on their overall power, but it explicitly does not consider Soldier Power. This means that factors like Hero Power, Tech Power, and Gear Power are the primary determinants.
2. Squad Configuration & Hero Selection You will command three squads. While the troops are fixed, you choose the three heroes for each squad.
- For most players: Consolidate your strongest heroes and gear into one "main" squad. Create two other squads with your remaining heroes. It's better to have one very powerful army than three mediocre ones.
- For high-level players (Whales): If you have enough powerful heroes and gear, consider creating specialized squads. For example, one squad could be focused on defense (e.g., using Eric, Jaeger, Hilde) to hold key points, while another is built for pure offense (e.g., Amadeus, Marlin, Petra).
3. Pre-Battle Coordination This event is highly dynamic, and real-time communication is a massive advantage.
- Use Voice Chat: Coordinate your alliance using a service like Discord.
- Appoint Leaders: Designate "Raid Callers" or "Legion Commanders" who can direct troop movements, call out targets, and manage strategy for the entire team. This prevents chaos and ensures a unified effort.
4. Using Buffs (Pet Skills & Consumables) Activate your pet skills and city buffs right before the battle begins to ensure they last for the full 1-hour duration.
- Effective Bonuses: All combat-related pet skills (e.g., Attack Bonus, Enemy Health Penalty) and city buffs (e.g., Squads' Attack, Defense, Health) will work.
- Ineffective Bonuses: March Speed and Deployment Capacity bonuses (such as those from the Grizzly Bear and Mighty Bison pets) do not apply in this game mode.
Part III: Match Phase Breakdown & Expert Tips
The battle is divided into four distinct phases.
Phase 1: Preparation (First 3 Minutes) You have three minutes before the battle starts. Use this time wisely.
- Scout the Map: Familiarize yourself with the layout and the locations of key buildings relative to your Headquarters.
- Analyze Opponents: Tap the banners at the top of the screen to see how many participants each opponent has. This can inform your initial strategy.
- Plan Your Opening: Coordinate with your team on which initial buildings to capture.
Phase 2: Seize & Conquer (17 Minutes) This is the opening phase where you establish your territory.
- Tip #1: Shotgun Start: Don't let your squads sit idle. The moment the battle begins, deploy all three squads to capture different nearby neutral buildings simultaneously. This will kickstart your point generation.
- Tip #2: Back Capture: As you push into contested areas, look for opportunities to bypass a large fight. Send a squad to capture a less-defended building behind the enemy's front line. This disrupts their point generation and can cut off their path.
- Tip #3: Exploit Gaps: Pay attention to where the two enemy alliances are fighting. If they are heavily engaged with each other on one side of the map, their other side may be vulnerable to your attack.
Phase 3: Garrison Occupation (20 Minutes) Garrisons unlock in this phase and are high-priority targets.
- Tip #4: Garrison Prep: Towards the end of the "Seize & Conquer" phase, start moving your strongest marches to positions next to the enemy Garrisons. The moment they become available, you can launch an immediate attack.
- Controlling Garrisons is key as they provide a huge number of points and a high-value Captain slot for energy generation.
Phase 4: Temple Onslaught (Final 20 Minutes) The final and most critical phase. The Temple of Tides, located in the center, becomes active.
- Tip #5: Temple Timing: The Temple is initially defended by 10 NPC guards. To capture it, you must defeat the 10th and final guard. Sending your troops too early will only weaken the guards for another alliance to steal the final hit. Try to time your march to arrive when only 1 or 2 guards are left.
- Tip #6: Temple Cutoff: A powerful strategy is to capture the Shrines and Transit Hubs that lead to the Temple from your opponents' territories. This creates a choke point and blocks them from sending reinforcements, allowing your alliance to secure the Temple with less resistance.
- Tip #7: Look Elsewhere: While the Temple is the biggest prize, don't get tunnel vision. If the fight for the Temple is a stalemate, it might be more profitable to send squads to capture other undefended high-value buildings like Garrisons or Shrines across the map.
Part IV: Advanced Mechanics & Final Reminders
- Energy Management & Captains: Capturing buildings allows you to appoint Captains, which significantly boosts your alliance's energy generation rate. Alliance leaders (R4/R5) or appointed Legion Commanders should actively manage these slots, assigning them to players who need energy the most. Prioritize filling the high-yield slots from Garrisons (+60,000/min) and Shrines (+45,000/min).
- Battle Speedups: If 5 or more squads are queued at a battle, you have the option to spend 5,000 Gems to reduce the battle timer for all queued squads to 1 second. This is extremely expensive and appears to have a limited number of uses per team. Save this for a critical, game-winning moment, such as securing the Temple of Tides in the final seconds.
- Critical Rule: DO NOT LEAVE THE BATTLE! You must be present in the event when the "tally phase" begins after the match ends. If you leave before this, you will forfeit all of your alliance and personal rewards.
Conclusion
By mastering these fundamentals, preparation strategies, and in-match tips, you and your alliance will be well on your way to dominating the Tri-Alliance Clash. Remember that communication and adaptability are your greatest weapons on the KingShot battlefield. Good luck, and may your alliance emerge victorious