KingShot Combat Guide: Mechanics, Stats & Expedition Strategy
Deep-dive expedition combat manual based on Strat Games Sloth's video. Learn targeting logic, troop ratios, buff math, rally roles, and hospital management to dominate every fight.
Battle Focus
Expedition Combat
Break down the exact attacker/defender turn order so you know when each troop line collapses.
Stat Priority
Health & Lethality
Follow the video’s math to push Infantry HP buffers and Archer lethality spikes before anything else.
Team Play
Rally Hierarchy
Learn why only captains should pop consumables and how joiners add value through troop presets.
Combat Pillars to Master
- 🔁 Round-by-round targeting logic and cavalry bypass odds.
- 📊 Buff math separating additive layers from multiplicative “special” effects.
- ⚔️ Preset troop ratios for PvE, PvP, and emergency counters.
- 🏥 Hospital management to prevent stealth troop deletions mid-war.
Checklist Before You March
- Confirm presets (Tank vs. Damage) have updated hero captains.
- Check infirmary + enlistment capacity; free beds if needed.
- Assign buffs to the rally leader only; brief joiners on ratios.
- Scout for Archer-heavy targets before swapping to Cavalry formations.
Video Companion Notes
Detailed Combat Breakdown
1. Why Mechanics Matter (Video Overview)
Strat Games Sloth opens the video by pointing out a harsh reality: combat in KingShot is mostly a black box. We only see battle reports, not the simulation that determined them. That opacity causes false theories on Discord about why a march won or lost. To break the confusion, he mapped out every expedition step—troop deployment, target priority, stat math, buff stacking, troop ratios, and injury outcomes—then tied each mechanic to actionable strategies.
Key promises from the video (and this written companion):
- Understand the entire battle loop so you can predict what happens when a line collapses.
- Learn which stats (Health & Lethality) are multiplicative win conditions versus supporting stats (Attack & Defense).
- Master buff math, discover why special buffs scale over time, and stop wasting consumables when you are not the rally leader.
- Configure troop presets for PvE, PvP, and emergency counters.
- Avoid unnecessary losses by managing infirmary space and skipping death-trap objectives (player cities and Level 4 outposts).
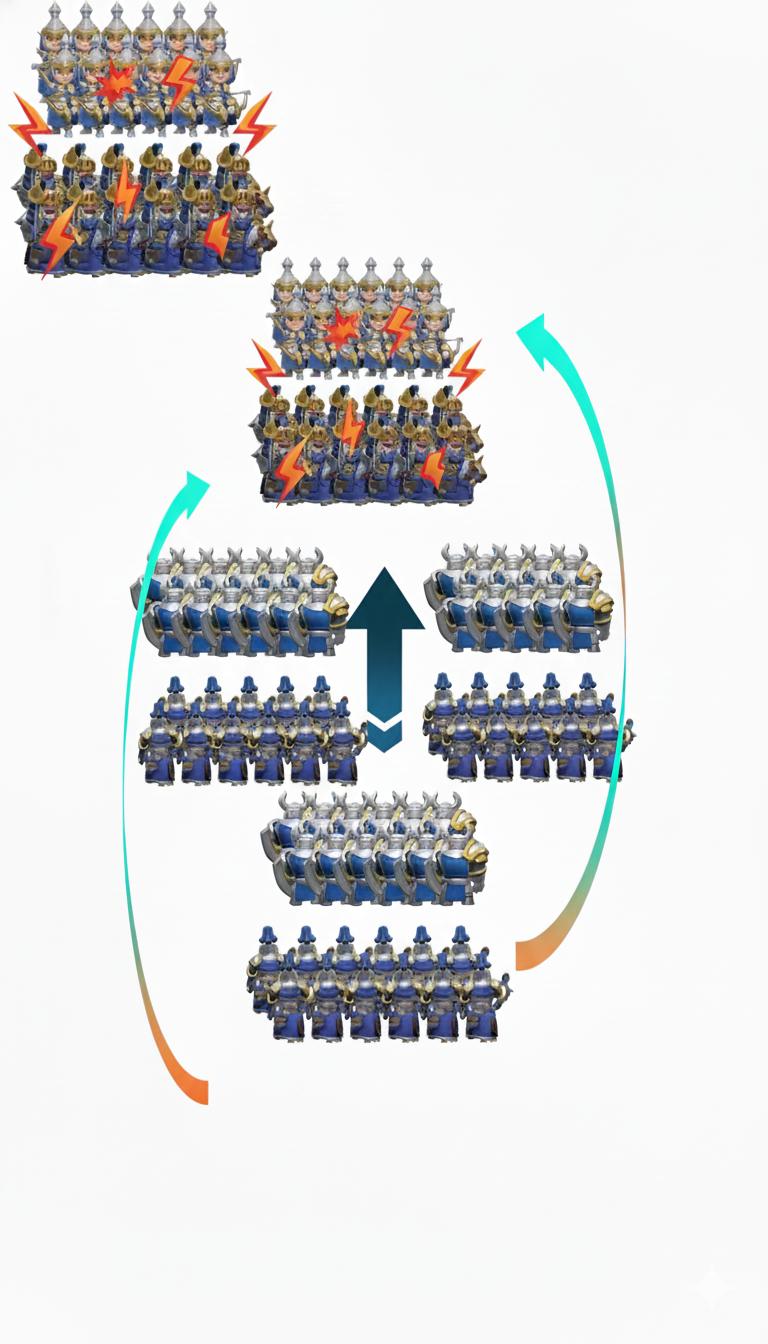
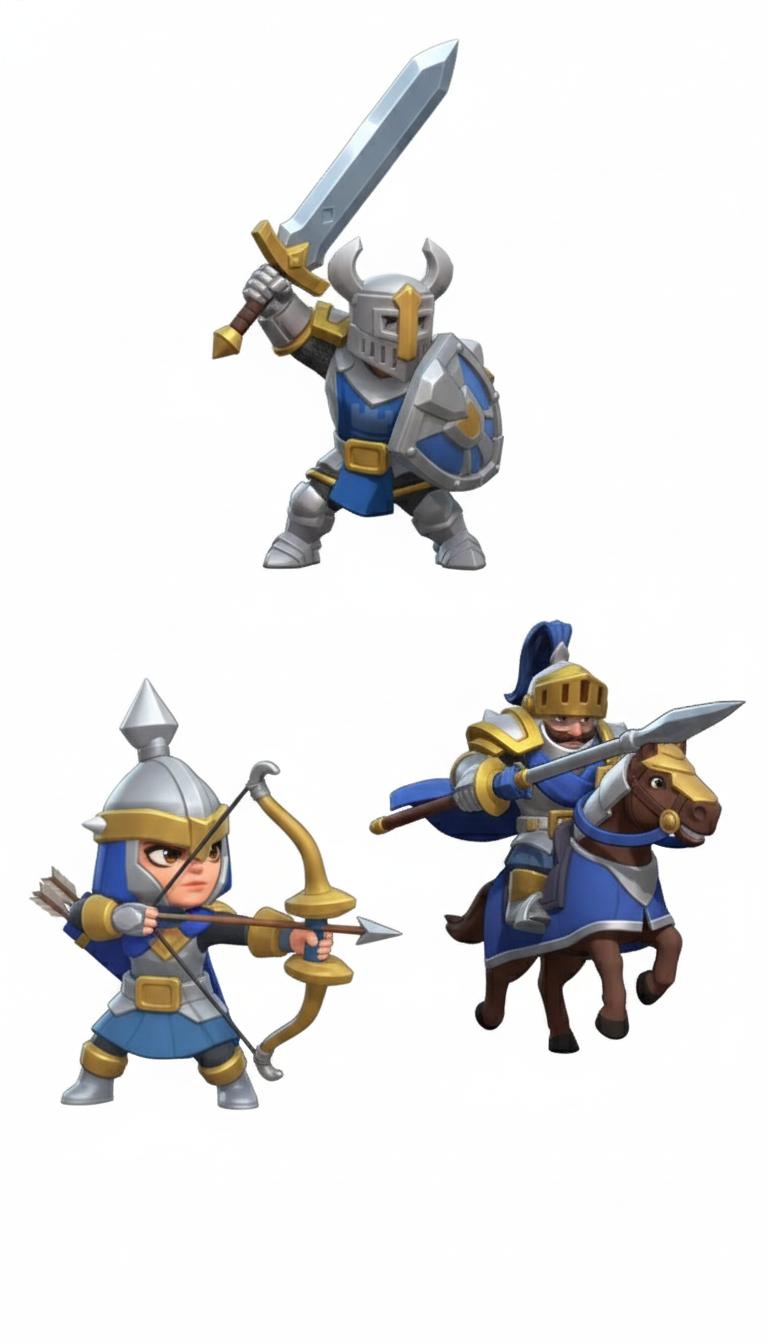
2. Troop Archetypes & Roles (Rock-Paper-Scissors Reinvented)
The video reinforces the internal Rock–Paper–Scissors logic but adds nuance for each troop type. Treat this as the foundation for every formation you send.
🛡 Infantry – Shield Wall and Anti-Cavalry Specialists
- Battle Position: Frontline tanks that absorb the opening salvo every round.
- Stat Profile: Highest base Health and Defense, but low Attack and Lethality.
- Ability Package: Master Brawler grants bonus damage/mitigation versus Cavalry; True Gold unlocks a barrier that negates a percentage of incoming damage.
- Video Tip: Because infantry have more base HP than Defense, buffing HP yields higher absolute durability than equivalent Defense buffs.
🐎 Cavalry – Midline Flex Units with Archer-Diving RNG
- Battle Position: Middle line by default; becomes the new frontline as soon as infantry collapse.
- Stat Profile: Balanced attack/defense; no stat spikes.
- Ability Package: Charge brings heightened damage against archers, and Ambusher lets 20% of Cavalry bypass the enemy frontline each round to snipe archers.
- Video Tip: That 20% bypass explains why your infirmary fills with archers even when you win. Plan healing speedups accordingly.
🏹 Archers – Primary Damage Dealers (Glass Cannons)
- Battle Position: Backline; ideally never touched.
- Stat Profile: Top Attack and Lethality; bottom-tier Health and Defense.
- Ability Package: Volley skills focused on deleting infantry.
- Video Tip: Because archers scale best with Lethality, investing in Archer-exclusive heroes, charms, and widgets has the highest damage return on investment.
3. Expedition Combat Simulation: Round-by-Round Flow
Strat Games Sloth carefully reconstructs the hidden combat loop—critical context when analyzing reports.
- Deployment: Troops spawn in order (Infantry → Cavalry → Archers).
- Target Selection (Attacker Phase):
- Everyone focuses the frontmost enemy line.
- Cavalry Exception: 20% of Cavalry break formation and dive archers.
- Damage Resolution: Lethality vs. Health determines how many troops get removed from combat.
- Casualty Removal: Eliminated troops leave the formation instantly.
- Defender Phase: Defender repeats the same targeting/damage calculation.
- Line Collapse: When a line hits zero, all attacks retarget the next surviving line.
- Victory Check: Rounds alternate until one side has zero troops.
Why Tanks + Archers Die First: Infantry eat every attack until they fold, while archers absorb stray Cavalry charges. Cavalry, ironically, often survive because they draw less aggro until late.
4. Core Stats Explained (What the Video Clarified)
| Stat | What It Does | Strategic Weight |
|---|---|---|
| Health (HP) | Total damage a troop can take before removal. | Tier S – most impactful defensive stat. |
| Lethality | Directly removes enemy HP when you attack. | Tier S – offense stat that actually kills units. |
| Defense | Reduces damage inflicted by enemy Lethality. | Tier A – important yet subject to possible diminishing returns. |
| Attack | Lowers enemy Defense, indirectly boosting your Lethality. | Tier B – supportive role. |
| Speed | Fixed at 11 for every troop; no known modifier. | Currently useless. |
Video insights:
- We do not know if Defense can fully negate incoming Lethality, so extra HP is always at least as valuable as extra Defense.
- Because Infantry start with higher HP than Defense, each % boost to HP yields more raw survivability than a % boost to Defense.
- Attack helps, but Strat repeatedly shows that Lethality scaling delivers bigger kill spikes. Prioritize Lethality on damage marches and HP on frontlines.
5. Buff Math: Standard vs. Special (The Biggest Misconception)
Strat breaks buffs into two categories:
Type A – Standard Buffs (Additive Layer)
- Sources: Governor Gear, Charms, City/March skins, Alliance research, Personal research, Alliance buildings.
- Math: Buffs simply add together. Two 10% Attack buffs = 20% total before being applied to the base stat.
- Visibility: Most of these appear in the Bonus Overview, except troop-specific hero or gear buffs that apply only to the march including them.
Type B – Special Buffs (Additive + Multiplicative Layer)
- Sources: Hero abilities (e.g., Marlin’s Admiral of the Line), exclusive widgets, Kingdom titles (King/Ministers), consumable 12h/24h army boosts, debuffs you cast on the enemy.
- Math Pipeline:
Final Buff = (Base Stat × (1 + Standard Buff Total)) × (1 + Special Buff %)+Special Buff % - Example from the video: With 200% Standard buffs and 40% combined Special buffs, you end up at 320% effective bonus—not 240%.
- Scaling Impact: The stronger your standard buffs, the bigger the multiplier effect of Special buffs becomes.
- Debuffs: Treated as negative Special buffs, so they are disproportionately strong versus late-game whales.
Consumable Usage Rule
- Only burn your 12h/24h Attack/Defense buff items if you are the rally leader or the defender whose stats will be used for the garrison. Rally joiners’ consumables do nothing.

6. Rallies & Team Play: Responsibilities by Role
The video dedicates a section to rally logistics. Remember these three laws:
- The Rally Captain’s Build Is Everyone’s Build – Their heroes, research, skins, consumables, and titles apply to the entire rally.
- Joiners Bring Bodies, Not Buffs – Do not waste consumables. Focus on sending your highest-tier troops in ideal ratios plus a hero captain that grants the rally commander the right skill.
- Ability Stacking Rules:
- Flat bonuses stack (two “+25% Lethality” skills add 50%).
- Proc-based abilities do not add linearly; two 40% mitigation skills just provide two rolls at 40%.
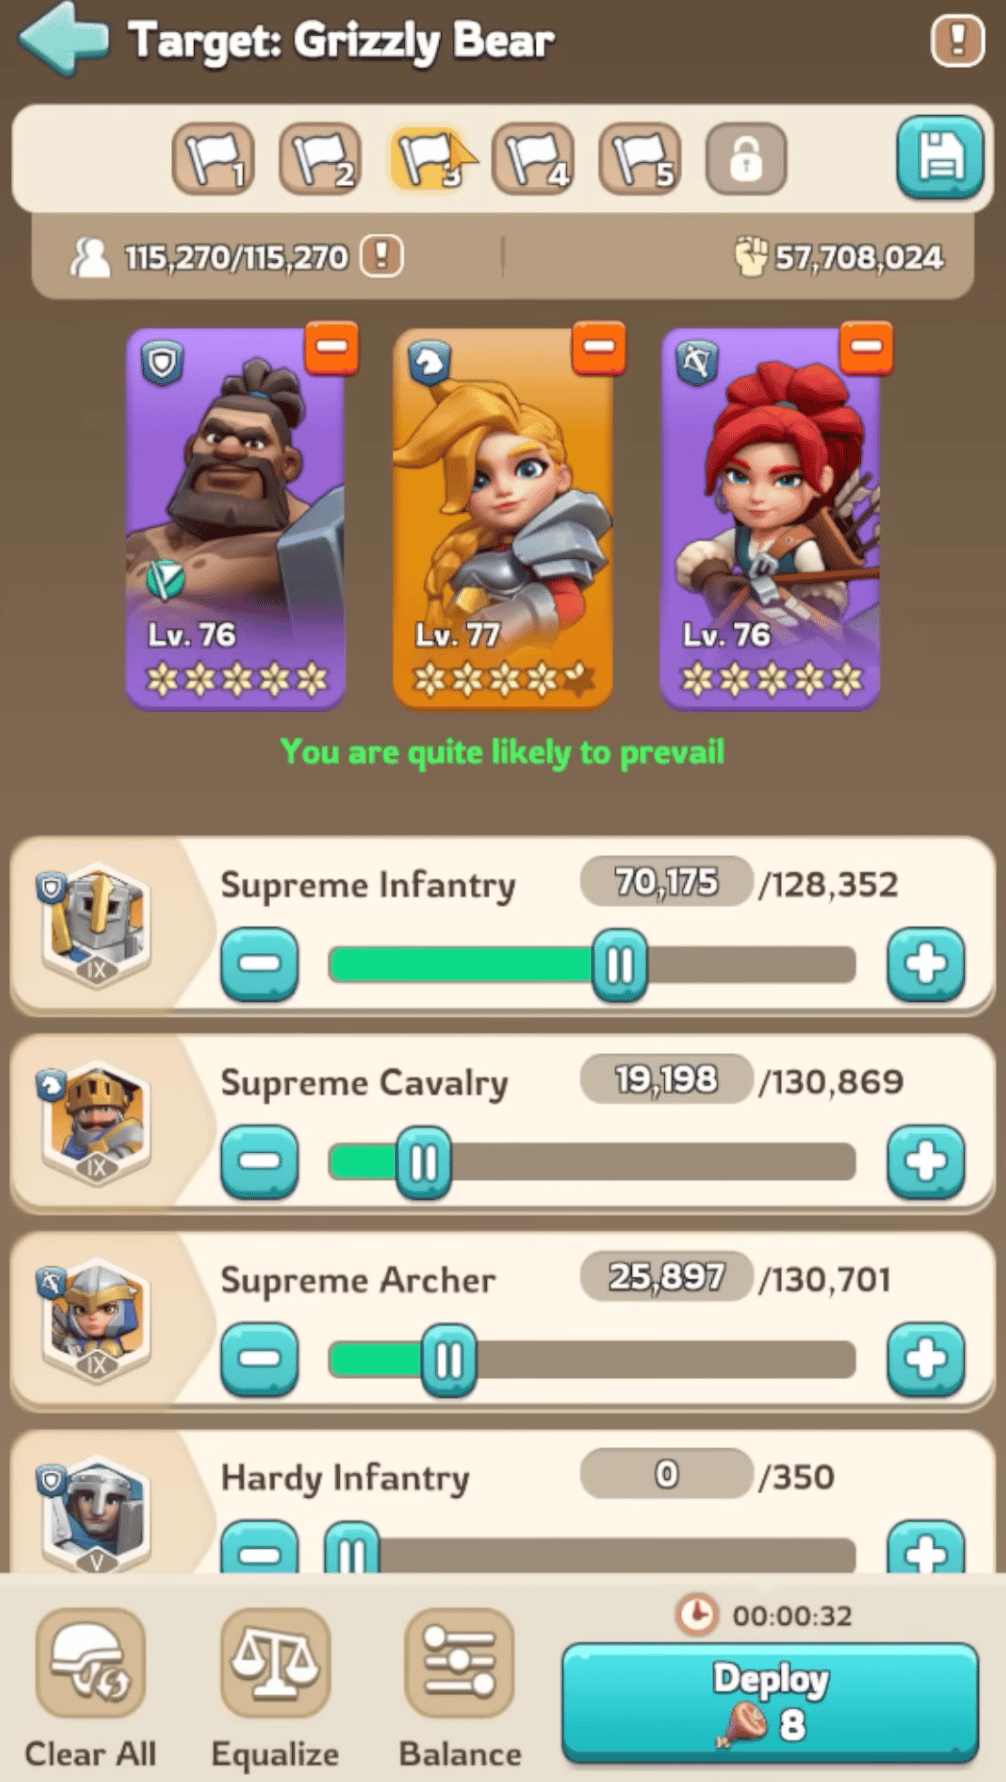
7. Troop Ratios, Presets & Counters
PvP / Castle or Sanctuary Defense (Survival Focus)
- Target Ratio: 50–60% Infantry, 20–25% Archers, 20–25% Cavalry.
- Reasoning: Keeping Infantry alive longer protects your DPS while soaking cannon shots and focused fire.
Rally or City Attack (Balanced Pressure)
- Starting Ratio: 45% Infantry, 25% Cavalry, 30% Archers. Tilt toward Cavalry if you scout an Archer-heavy defense you can realistically counter.
Bear Hunt / PvE Bossing (Damage Focus)
- Target Ratio: 10% Infantry, 10% Cavalry, 80% Archers.
- Reasoning: Bears do zero return damage, so you should lean entirely into lethality.
Emergency Cavalry Pivot
- Only go Cavalry-heavy if scouting reveals the defender sent a reckless Archer stack. Otherwise, Specialist Cavalry marches are inefficient in the current patch because nothing pushes their utility beyond that 20% bypass.
8. Stat Priorities & Investment Order
Following the logic in the video, build your account in this order:
- Archer Lethality: Unlocks faster kills and shortens fights before attrition hits.
- Infantry Health: Keeps the frontline alive long enough for Archers to work.
- Infantry Defense / Archer Attack: Secondary layer once the top two are decent.
- Cavalry Investments: Lowest ROI until the developers buff Speed or add more Cav-specific events.
Action items the creator highlighted:
- Research: The Battle tree nodes that buff Health/Lethality outrank the ones buffing Attack/Defense.
- Charms vs. Gear: Charms hit Health/Lethality, while most governor gear covers Attack/Defense. Choose accordingly.
- Hero Widgets: Prioritize unlocking widget slots and exclusive gear on Infantry/Archer legends first; they provide both stats and special skills.
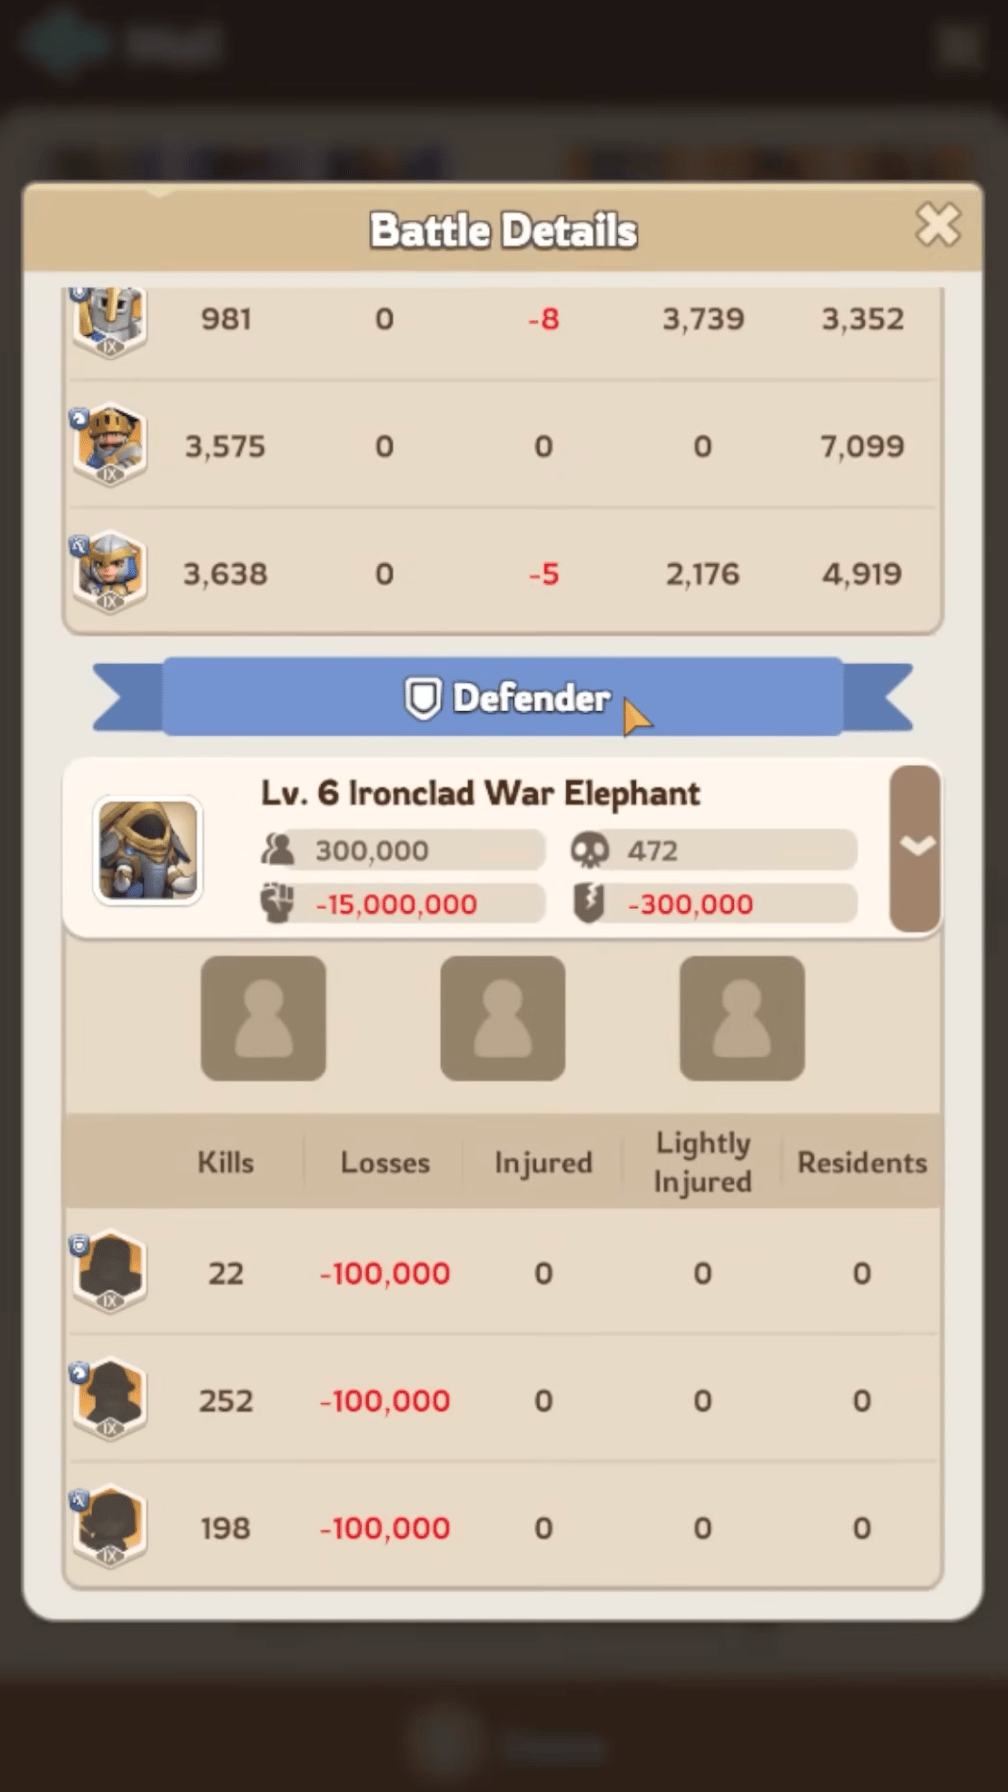
9. Battle Outcomes: Lightly Injured vs. Injured vs. Losses
Every location in KingShot has a preset casualty split. Memorize the table so you know where troops will die permanently.
| Activity | Lightly Injured | Injured (Hospital) | Losses (Dead) |
|---|---|---|---|
| Hunting (Beasts/Terrors) | 98% | 2% | 0% |
| Attacking Player City | 55% | 10% | 35% ☠️ |
| Defending Your City | 65% | 35% | 0% |
| Sanctuary / Fortress | 70% | 30% | 0% |
| Resource Tiles / Flags | 65% | 35% | 0% |
| Level 1 Outpost | 90% | 10% | 0% |
| Level 2 Outpost | 80% | 20% | 0% |
| Level 3 Outpost | 70% | 30% | 0% |
| Level 4 Outpost | 60% | 30% | 10% ☠️ |
Video callouts:
- Level 4 Outposts are traps. Both sides suffer 10% permanent losses. Confirm the UI tooltip before committing.
- Player-City Offense is Expensive. 35% of dead troops are deleted instantly. Avoid unless revenge is worth it.
- Infirmary Overflow: Once full, “Injured” troops convert to deaths. Keep hospital slots open before a big war.
- Lightly Injured Behavior: When defending a structure, lightly injured troops disappear from the garrison until the fight ends. Time reinforcements between multi-wave attacks.

10. Tactical Blueprint from the Video
Use this as your repeatable playbook.
Long-Term Growth Checklist
- Research Order: Prioritize Battle tree nodes that directly increase Archer Lethality and Infantry HP before dabbling in economic nodes.
- Hero Development: Favor Infantry/Archer heroes with teamwide buffs (e.g., Marlin, Jable for all-squad utility even if you don’t send Cavalry).
- Charms + Widgets: Spend event currency on charms/widgets that buff HP/Lethality. Only upgrade Cavalry items as a late priority.
- Titles & Consumables: Save them for wars you must win. They are multiplicative; do not waste them during farm raids.
Pre-Battle Execution Checklist
- Scout First: Identify enemy ratios. Counter Archers with additional Cavalry only when you confirm they over-invested in Archers.
- Update Presets: Maintain a “Tank” preset (60% Infantry) and a “Damage” preset (80% Archers) so you can swap instantly.
- Hospital Check: Ensure you have open beds to avoid surprise deaths mid-war.
- Consumable Rule: Only the rally leader or defensive garrison captain should pop 12h/24h buffs.
- Hero Captains: Rally joiners must equip the requested hero so the army gains the right activated ability.
- Battle Reports: After every fight, study the report to see which troop types dropped fastest and whether different ratios could flip the next round.
11. Video Recap – Key Sound Bites
- “Every troop has a job, but some jobs are more versatile. Archers win fights; Infantry keep them alive; Cavalry slot in when the opponent over-commits to Archers.”
- “Consumable buffs are way more powerful than the tooltip suggests—but only if your stats are the ones applied to the march.”
- “Avoid fights you cannot win or fights that auto-convert into losses, like town attacks or Level 4 outposts.”
- “Keep your formations updated; otherwise, you’re just guessing during the most expensive part of the game.”
Use these reminders to align your alliance on the same doctrine. The more players understand why lineups and buffs matter, the faster you’ll start trading up in every meaningful fight.
Put the Combat Math to Work
Combine this combat guide with our rally mechanics and battle report tutorials to lead confident fights, translate every report into action items, and stop bleeding troops to misinformation.
Related Combat & War Guides
Rally Mechanics
Discover optimal captain heroes, stackable abilities, and rally joiner etiquette.
Castle Battle Ops
Prep defensive turrets, schedule reinforcements, and manage overlapping rally timers.
Battle Report Decoder
Learn to reverse-engineer miscues and counter enemy stat spreads in the next fight.
Top Up Kingshot — Save up to 20%
Best price on LootBar. Fast 3-min delivery, secure payment. Use code #uqFs for extra savings.
⚡Top Up Now